- Published on
🎉 컬러리스트 프로젝트 #10 문제 목록 페이지 만들기
- 글쓴이
📌 목차

💁🏻
- 문제 목록 Table 만들기 및 문제 리스트 객체화
- 출력 버튼 만들기
- pagination만들기
- filter용 Select 버튼 만들기
- 문제 목록 페이지 만들기
마이페이지 문제 목록
1. 문제 목록 Table 만들기 및 문제 리스트 객체화
1.1 문제 목록을 보여주기 위해 일단 mockdata를 만들고 table로 보여줍니다.
먼저 mockdata를 만들었습니다.
const problemList = [
  {
    year: '2022년도',
    round: '1회차',
    type: '1-2',
    title: '문제 제목 얼레벌레 블라블라',
    solvedAt: '2022.7.23',
  },
  {
    year: '2022년도',
    round: '1회차',
    type: '1-2',
    title: '문제 제목 얼레벌레 블라블라',
    solvedAt: '2022.7.23',
  },
  {
    year: '2022년도',
    round: '1회차',
    type: '1-2',
    title: '문제 제목 얼레벌레 블라블라',
    solvedAt: '2022.7.23',
  },
  {
    year: '2022년도',
    round: '1회차',
    type: '1-2',
    title: '문제 제목 얼레벌레 블라블라',
    solvedAt: '2022.7.23',
  },
  {
    year: '2022년도',
    round: '1회차',
    type: '1-2',
    title: '문제 제목 얼레벌레 블라블라',
    solvedAt: '2022.7.23',
  },
  {
    year: '2022년도',
    round: '1회차',
    type: '1-2',
    title: '문제 제목 얼레벌레 블라블라',
    solvedAt: '2022.7.23',
  },
  {
    year: '2022년도',
    round: '1회차',
    type: '1-2',
    title: '문제 제목 얼레벌레 블라블라',
    solvedAt: '2022.7.23',
  },
  {
    year: '2022년도',
    round: '1회차',
    type: '1-2',
    title: '문제 제목 얼레벌레 블라블라',
    solvedAt: '2022.7.23',
  },
  {
    year: '2022년도',
    round: '1회차',
    type: '1-2',
    title: '문제 제목 얼레벌레 블라블라',
    solvedAt: '2022.7.23',
  },
  {
    year: '2022년도',
    round: '1회차',
    type: '1-2',
    title: '문제 제목 얼레벌레 블라블라',
    solvedAt: '2022.7.23',
  },
]
지금은 문제 수가 별로 많지 않지만, 나중에 늘어날 것에 대비해 문제 data를 객체화 시켜줍니다.
export const problemList = [
  {
    year: '2022년도',
    round: '1회차',
    type: '1-2',
    title: '문제 제목 얼레벌레 블라블라',
    solvedAt: '2022.7.23',
  },
  {
    year: '2022년도',
    round: '1회차',
    type: '1-2',
    title: '문제 제목 얼레벌레 블라블라',
    solvedAt: '2022.7.23',
  },
  {
    year: '2022년도',
    round: '1회차',
    type: '1-2',
    title: '문제 제목 얼레벌레 블라블라',
    solvedAt: '2022.7.23',
  },
  {
    year: '2022년도',
    round: '1회차',
    type: '1-2',
    title: '문제 제목 얼레벌레 블라블라',
    solvedAt: '2022.7.23',
  },
  {
    year: '2022년도',
    round: '1회차',
    type: '1-2',
    title: '문제 제목 얼레벌레 블라블라',
    solvedAt: '2022.7.23',
  },
  {
    year: '2022년도',
    round: '1회차',
    type: '1-2',
    title: '문제 제목 얼레벌레 블라블라',
    solvedAt: '2022.7.23',
  },
  {
    year: '2022년도',
    round: '1회차',
    type: '1-2',
    title: '문제 제목 얼레벌레 블라블라',
    solvedAt: '2022.7.23',
  },
  {
    year: '2022년도',
    round: '1회차',
    type: '1-2',
    title: '문제 제목 얼레벌레 블라블라',
    solvedAt: '2022.7.23',
  },
  {
    year: '2022년도',
    round: '1회차',
    type: '1-2',
    title: '문제 제목 얼레벌레 블라블라',
    solvedAt: '2022.7.23',
  },
  {
    year: '2022년도',
    round: '1회차',
    type: '1-2',
    title: '문제 제목 얼레벌레 블라블라',
    solvedAt: '2022.7.23',
  },
]
1.2 그리고 문제 목록을 보여줄 table을 react table을 이용해 만들어 줍니다.
저는 선택여부와 연도, 회차, 유형, 문제이름, 푼 날짜를 분류 기준으로 정하고 th로 만든 다음
아까 만들어놓은 problemList를 import해서 map을 통해
{item.year},{item.round}식으로 넣어주었습니다.
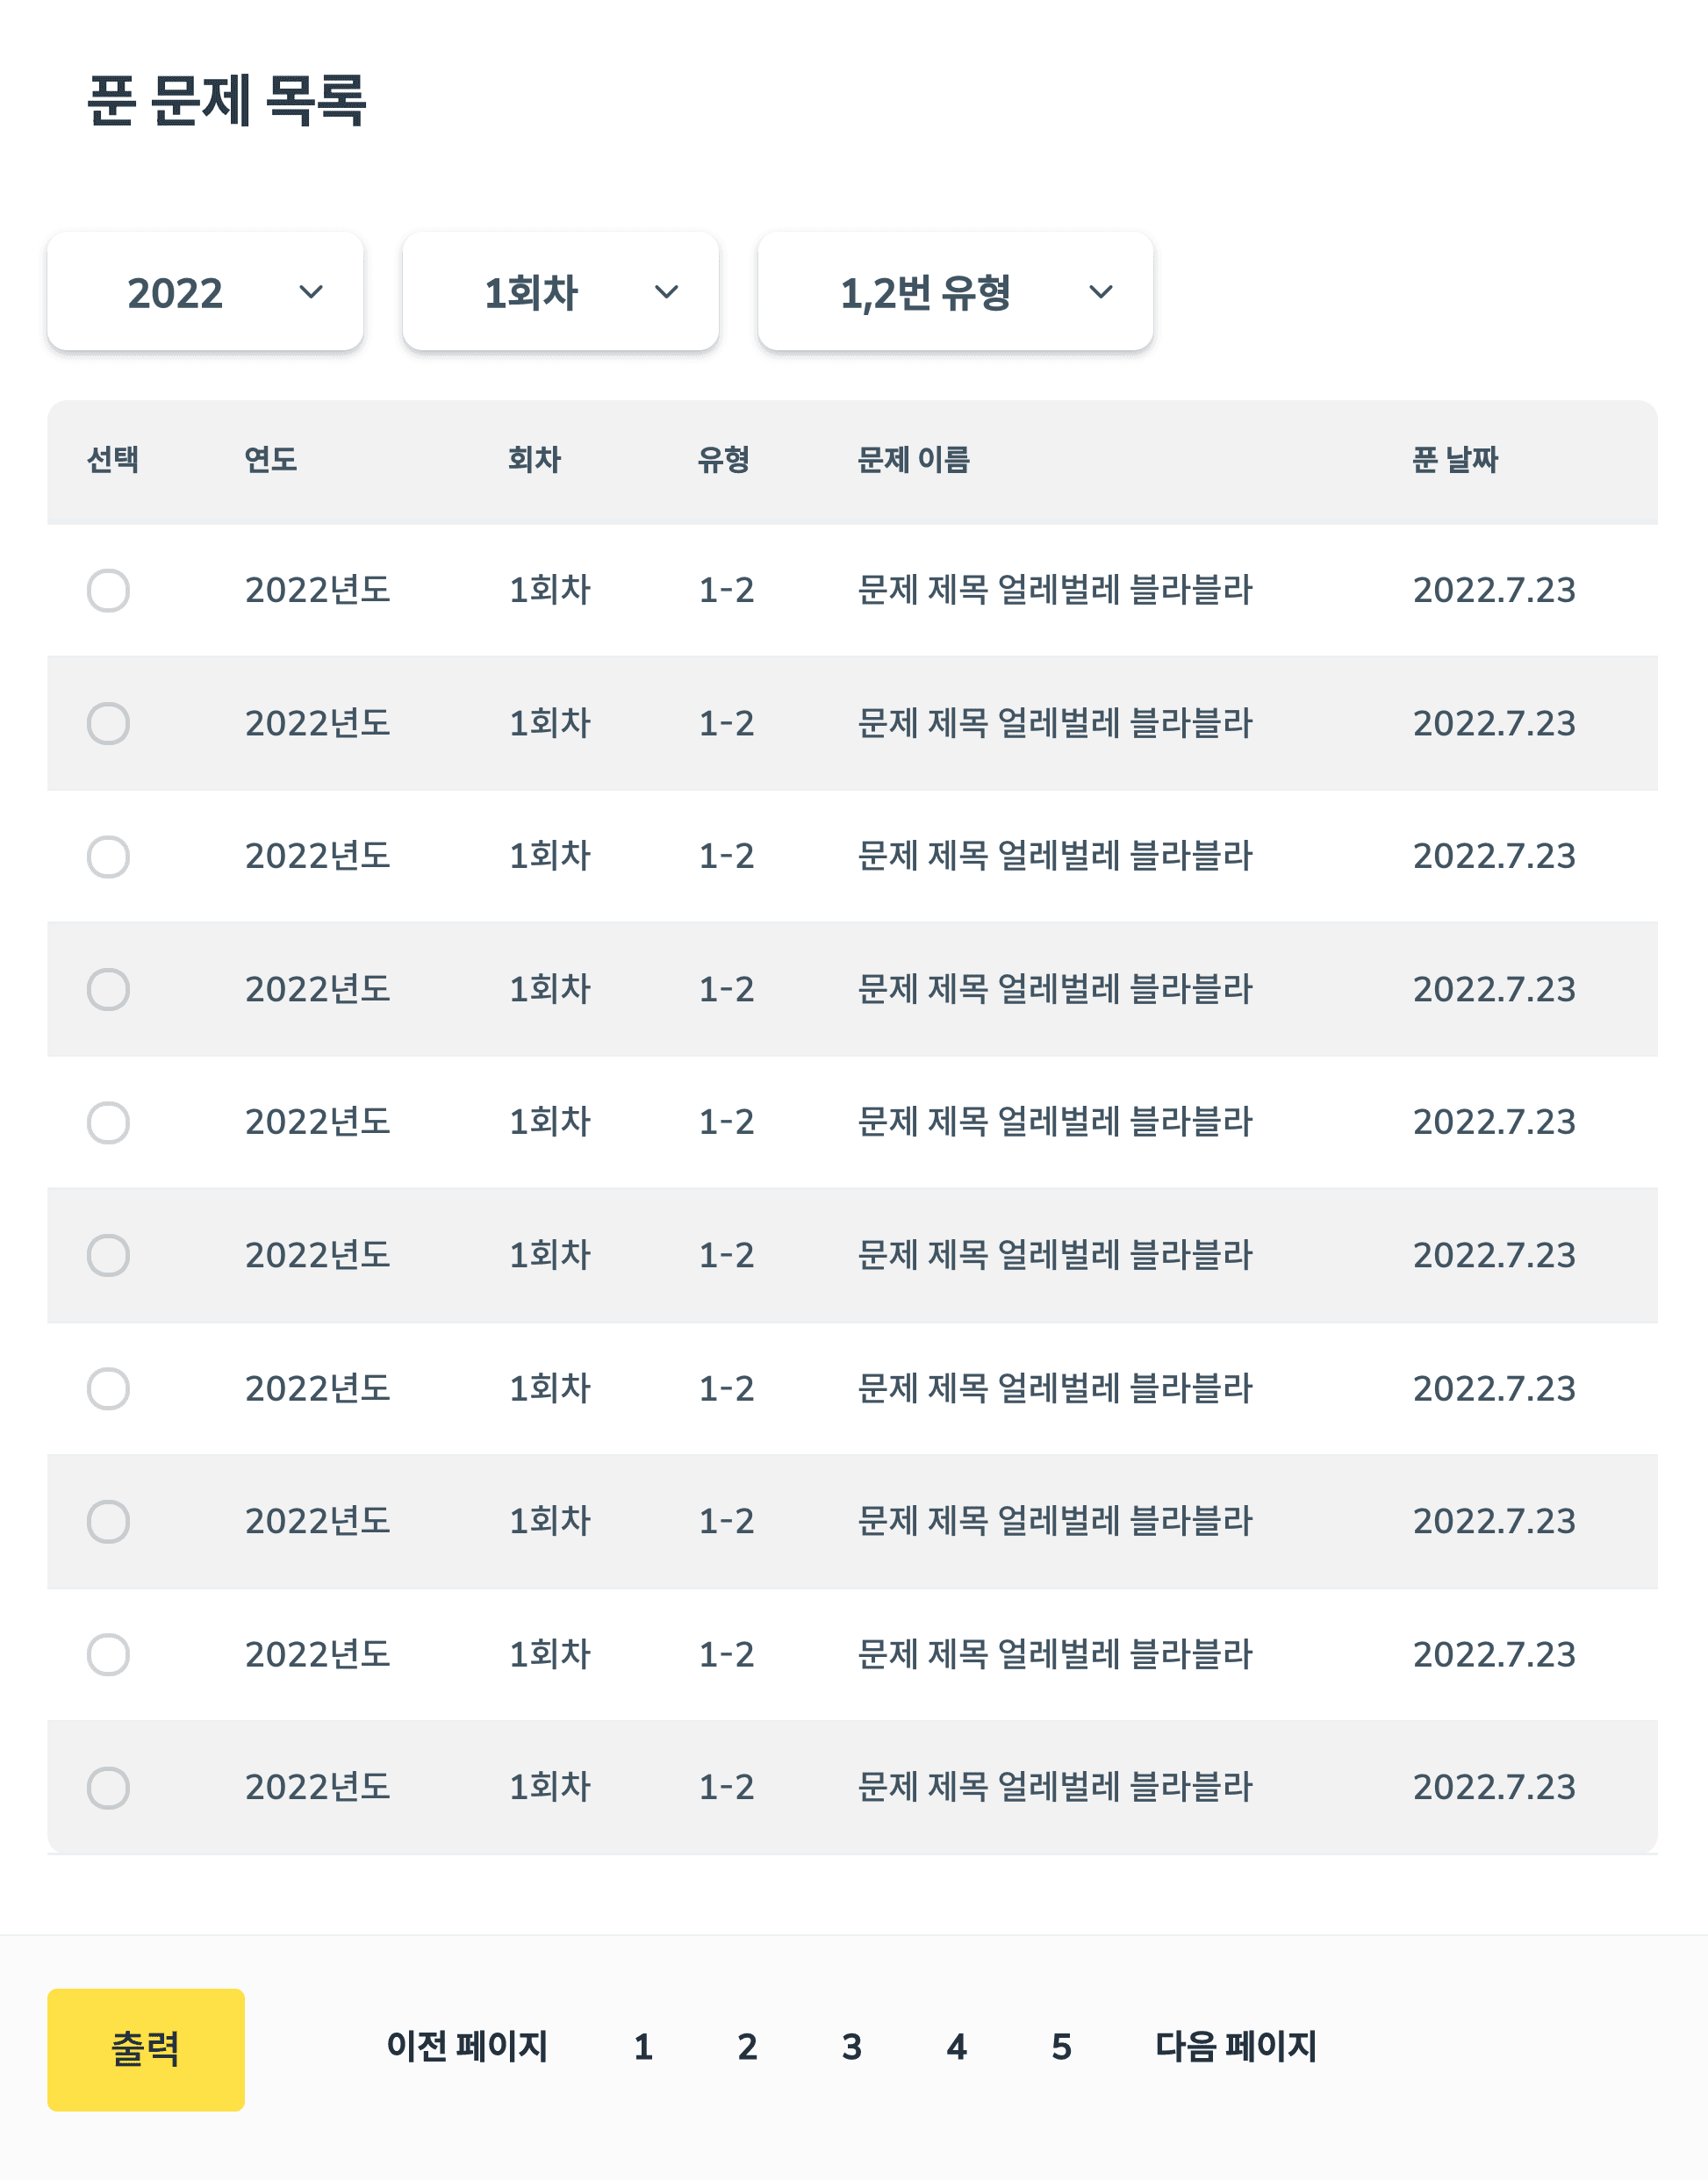
<div className="most-solved-list">
  <h3 className="mostSolved-Q-list-heading ml-4">가장 많이 푼 문제</h3>
  <table className="table table-zebra w-full" aria-labelledby="Mostsolved-list-heading">
    <thead>
      <tr>
        <th>선택</th>
        <th>연도</th>
        <th>회차</th>
        <th>유형</th>
        <th>문제 이름</th>
        <th>푼 날짜</th>
      </tr>
    </thead>
    <tbody>
      {problemList.slice(0, 5).map((item) => (
        <tr>
          <td>
            <input type="checkbox" className="checkbox checkbox-" />
          </td>
          <td>{item.year}</td>
          <td>{item.round}</td>
          <td>{item.type}</td>
          <td>{item.title}</td>
          <td>{item.solvedAt}</td>
        </tr>
      ))}
    </tbody>
  </table>
</div>
그리고 위와 같은 경우 가장 조회수가 높은 문제만 따로 볼 수 있도록 만든 table이라
5개씩 보일 수 있게
problemList.slice(0, 5).map((item) => ())식으로 slice를 이용해 잘라주었습니다.
2. 그 다음은 출력 버튼을 만들었습니다.
출력버튼은 왼쪽 하단 노란색 바탕으로 있는 작은 버튼입니다.
먼저 footer를 만든 다음에 그 안에 button을 만들어줍니다.
<footer className="flex flex-row justify-between">
  <button type="button" className="w-20 bg-yellow-300">
    출력
  </button>
</footer>
버튼의 className에 화면에 배치될 때의 길이와 색상을 tawilwind.css에 있는 button css를 보고 넣어주었습니다.
3. 그리고 pagination을 만들어줍니다.
똑같이 footer안에 넣어주는데, 대신 pagination은 따로 컴포넌트로 분리해 만들어주었습니다.
import React from 'react'

export default function Pagination() {
  return (
    <div className="flex flex-row">
      <button className="btn btn-ghost">이전 페이지</button>
      <button className="btn btn-ghost">1</button>
      <button className="btn btn-ghost">2</button>
      <button className="btn btn-ghost">3</button>
      <button className="btn btn-ghost">4</button>
      <button className="btn btn-ghost">5</button>
      <button className="btn btn-ghost">다음 페이지</button>
    </div>
  )
}
한 줄에 쭉 나열하기 위해 className을 flex flex-row로 해둡니다.
이렇게 button과 pagination을 만들면 정렬이 틀어지는데요.
3-1. 가짜 div를 만들어서 버튼의 반대편에 배치를 하고, opacity:0처리로 숨겨줍니다.
<footer className="flex flex-row justify-between">
  <button type="button" className="w-20 bg-yellow-300">
    출력
  </button>
  <Pagination />
  <div className="w-20 opacity-0">숨김</div>
</footer>
4. filter용 Select 버튼 만들기
그 다음은 문제 목록을 필터링하기 위해 filter용 select버튼을 만들었습니다.
사실은
dribbble에서 본 플러스 버튼을 눌러 필터를 하나씩 추가하는 식의 버튼을 만들고 싶었는데, 아직 그 부분은 어떻게 구현할 지 모르겠어서 일단 옵션 중에서 고를 수 있는 필터 버튼을 만들어보았습니다.
이 버튼도 SelectGroup이라는 컴포넌트로 분리해 만들었습니다.
import React from 'react'

function SelectGroup() {
  return (
    <div className="select-group mb-1">
      <select className="select w-32 mr-4 pop-box-shadow text-center text-base">
        <option disabled selected>
          2022
        </option>
        <option>2021</option>
        <option>2020</option>
        <option>2019</option>
      </select>
      <select className="select w-32 mr-4 pop-box-shadow text-center text-base">
        <option disabled selected>
          1회차
        </option>
        <option>2회차</option>
        <option>3회차</option>
      </select>
      <select className="select w-40 mr-4 pop-box-shadow text-center text-base">
        <option disabled selected>
          1,2번 유형
        </option>
        <option>3번 유형</option>
      </select>
    </div>
  )
}

export default SelectGroup
<select className="select w-32 mr-4 pop-box-shadow text-center text-base">라는 daisy ui의 css를 가져와서 적용해줍니다.
기본적으로 보여지는 옵션은 <option disabled selected></option>로 감싸줍니다.
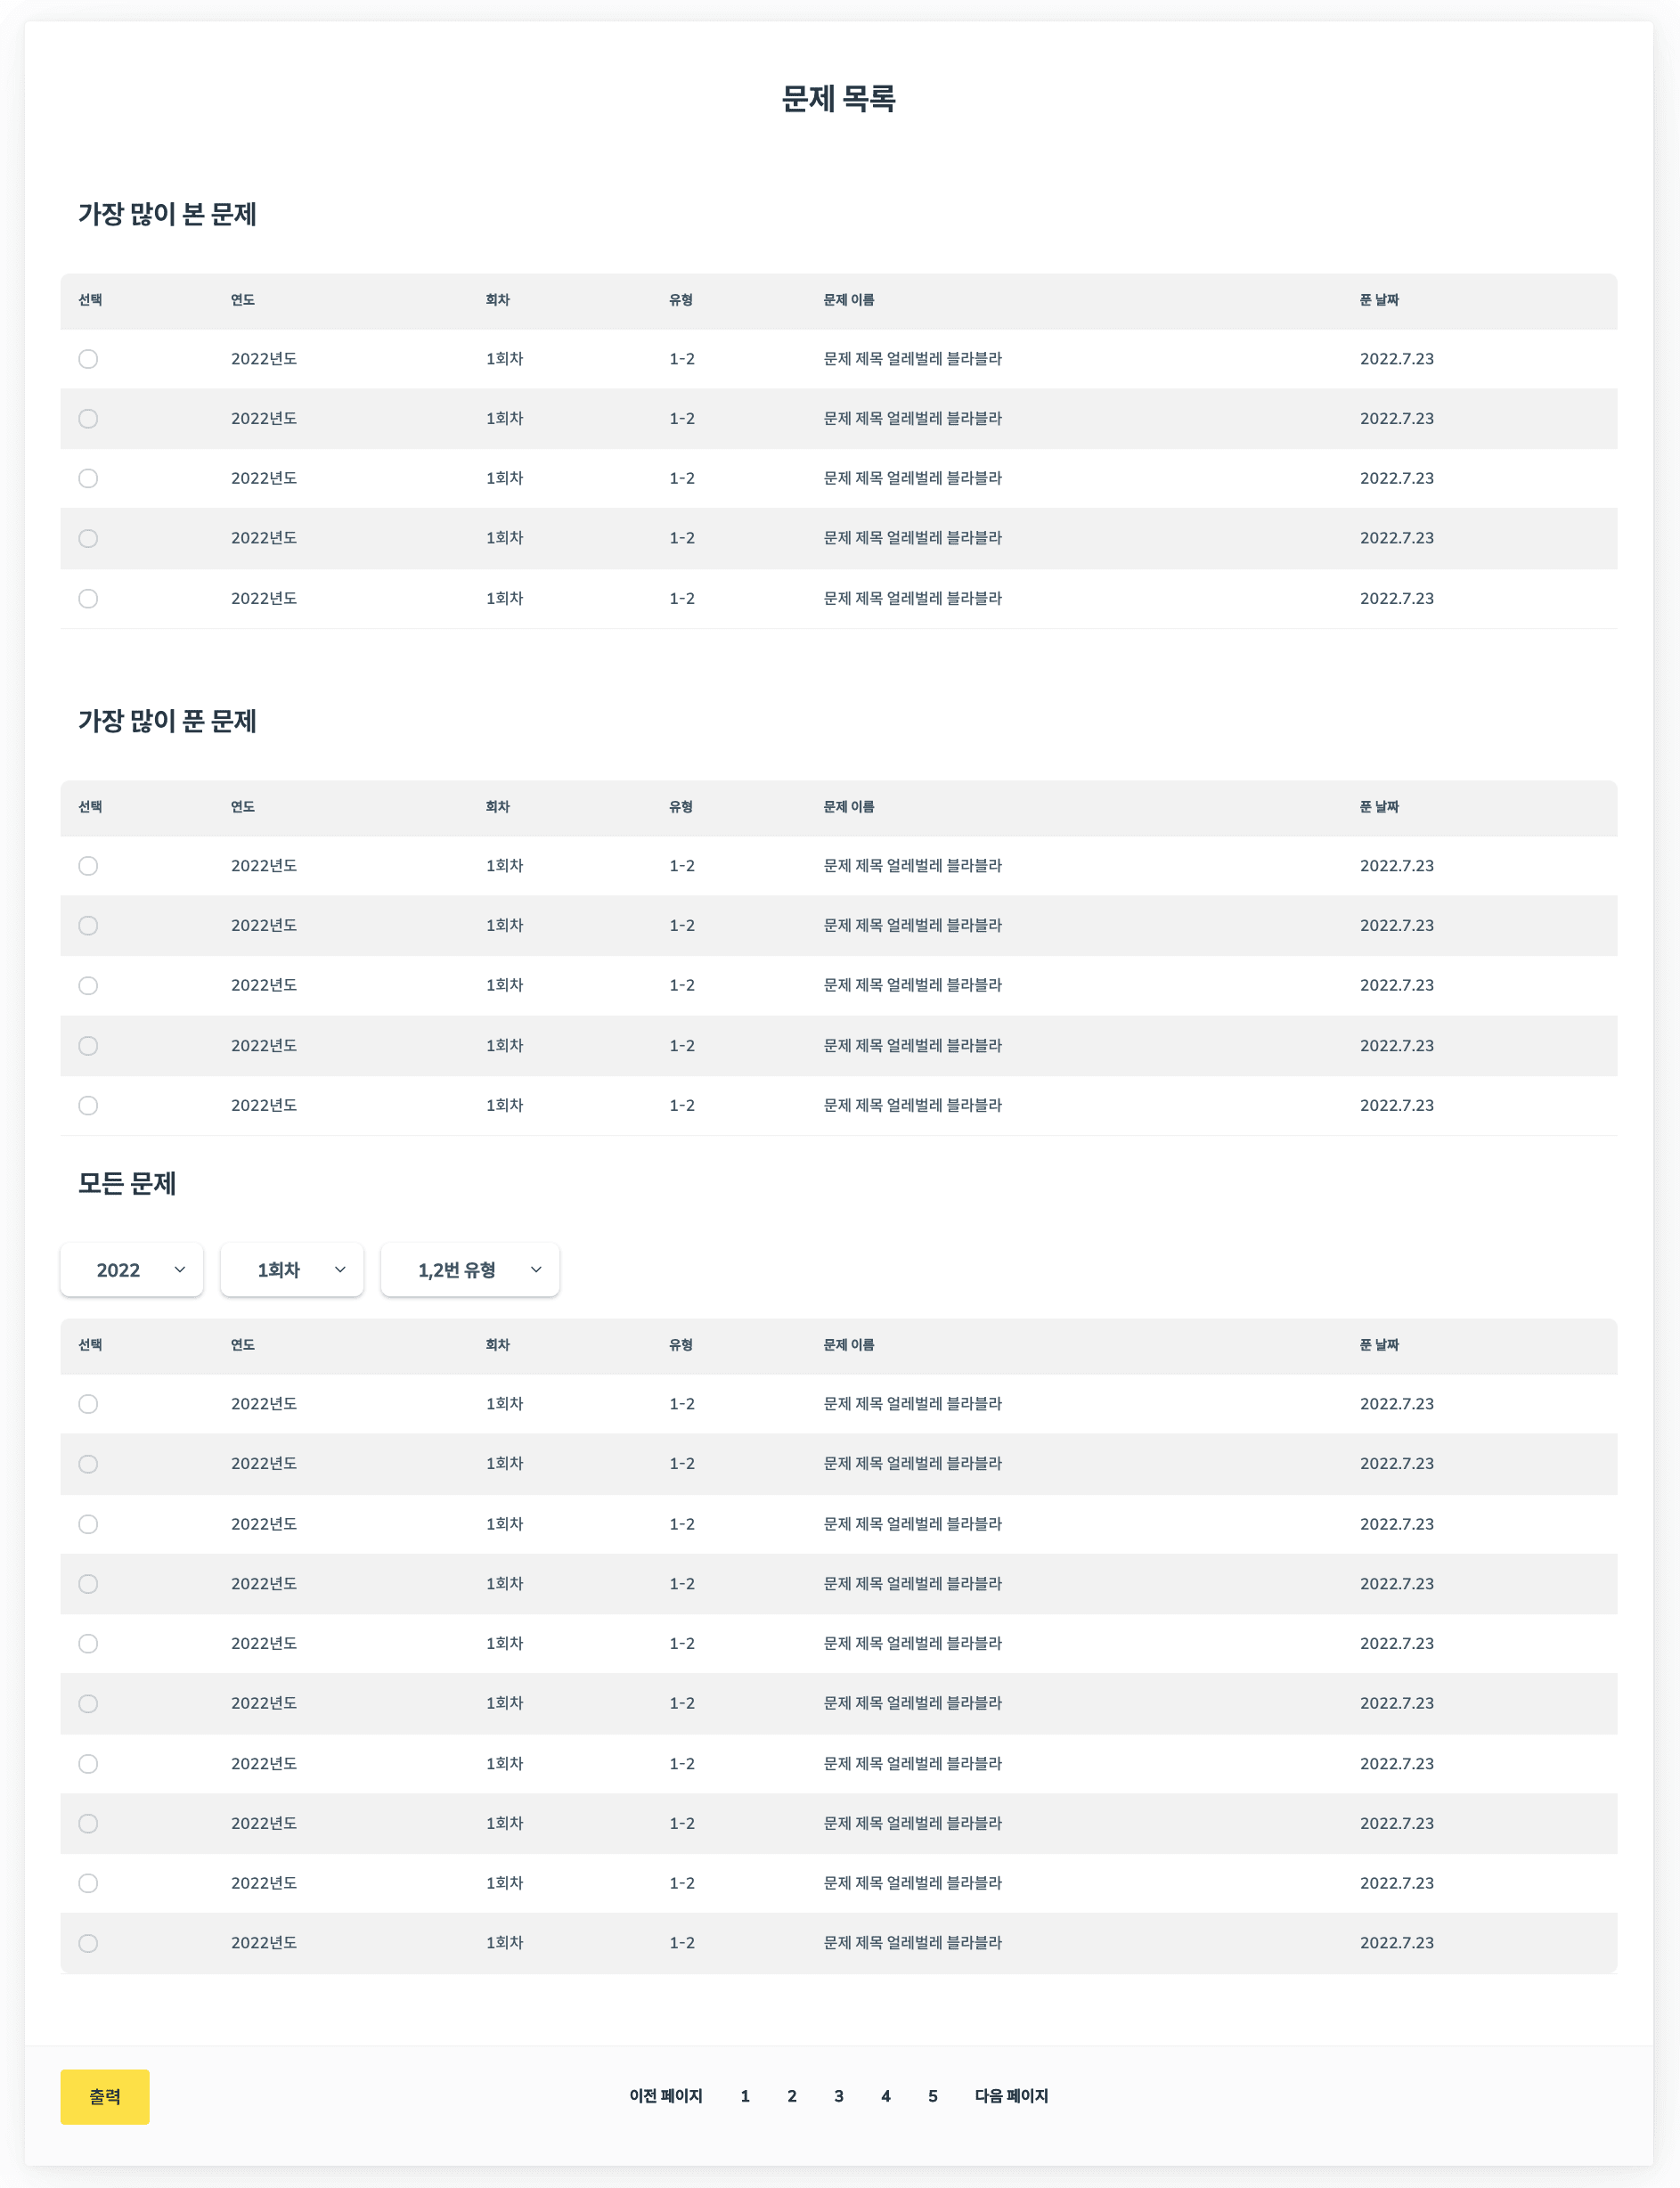
5. 문제 목록 페이지 만들기
위의 문제 목록을 마이 페이지에 만들었으면,
위의 틀을 그대로 활용해 문제 목록 페이지를 하나 더 만들고
3개의 문제 목록 테이블을 가져다 놓습니다.
대신 첫번째, 두번째 테이블은 slice를 통해 5개의 문제만 보이도록 해줍니다.
문제 목록 페이지